
As a member of the Etsy affiliate program and an Amazon Associate, I earn from qualifying purchases.
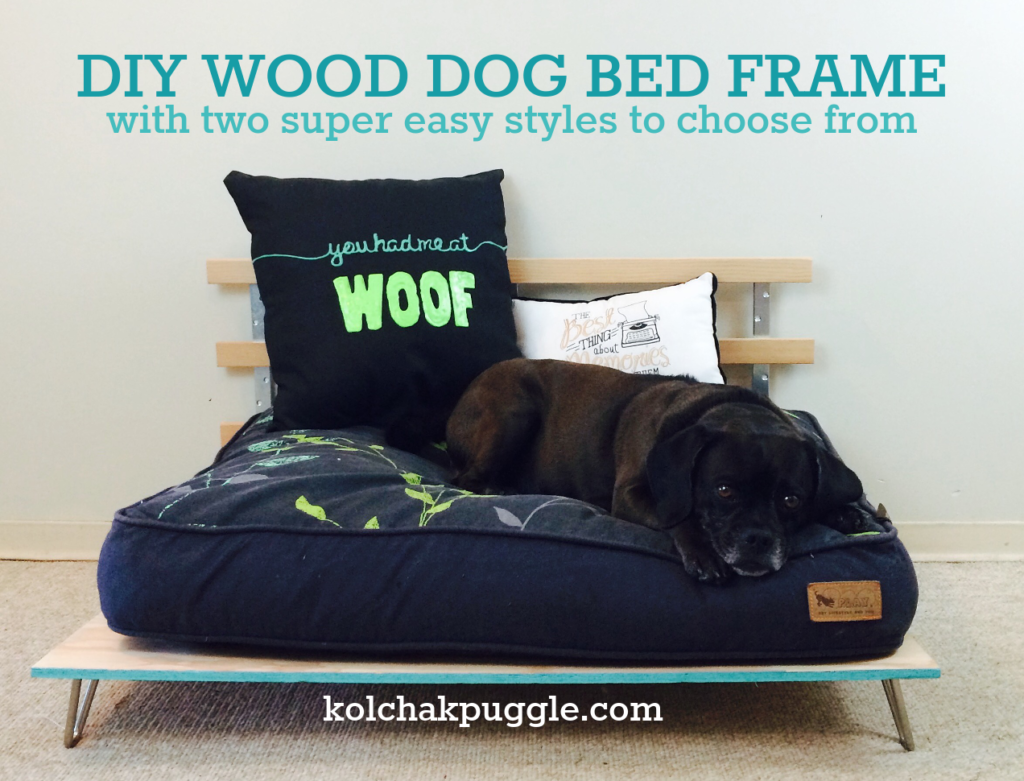
How to make your dog a wood dog bed frame – Kolchak Style

Step 1: Order your hairpin legs.
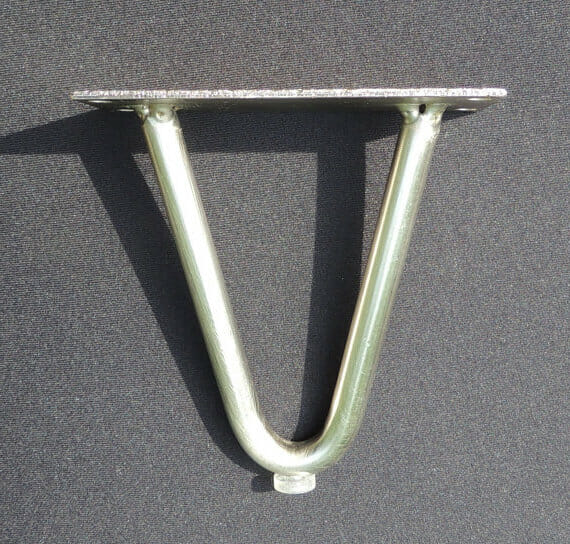
You guys, this is probably the most difficult part of this project: waiting for your fancy metal legs to arrive. I bought the 4″ metal hairpin legs that I used from Above and Beyond on Etsy. I love that they came with little rubber feet on them so if you have laminate or hardwood floors, they won’t slide around or scratch. I really think they make the beds look great and were absolutely worth the wait, but if they aren’t your style, you can find all sorts of styles of furniture legs at the hardware store, along with the hardware to install them.
Step 2: Determine what size your bed is.

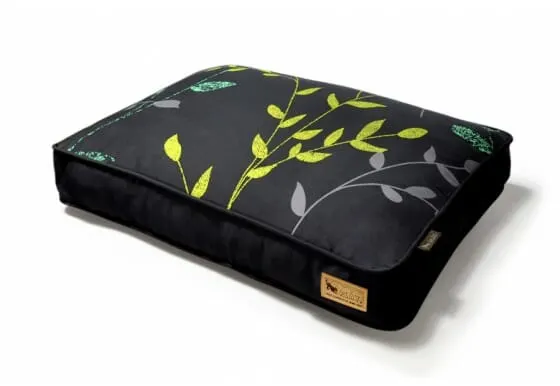
Koly and Fe have these awesome luxury dog beds that they love from P.L.A.Y. It takes a pretty awesome dog bed to woo my dogs off the couch and their Greenery beds consistently get the job done. So, since they’re our fav, we’ve created shopping lists that have the measurements for each of their standard sizes.
However, just in case you have a much-loved dog bed that is made by another brand, we’ve got you covered:
Measure the length and add 3″, then Measure the width and add 2″.
This is the size you will cut your plywood.
Step 3: Grab your shopping list and head to the Home Depot.
You can totally choose a different hardware store, if you want, but I love the Home Depot because they will cut your lumber for you, which means you don’t need any fancy power tools to create these beds and there’s way less mess for you to clean up at home.
You can download the shopping list and print it to take with you, but here’s a rundown of what you’ll need:
- 1/2″” or 3/4″ Plywood
- 1×2 Framing Lumber
- 4″ L Brackets/Corner Braces
- 4″ Mending Plates
- #10 x 1/2″ Tapping Screws
- #10 Washers
- Sandpaper
- Interior Paint in your chosen accent colour (the tester size is more than enough)
- Optional: Varathane Clear Coat
Step 4: Prep the wood.
Pull of any splinters and use the sandpaper to smooth out the edges and surface of your plywood and framing lumber.
Step 5: Paint the edges & Seal
Paint the edges of the plywood in your chosen accent colour. This may take 2 or 3 coats depending on the colour of paint you choose.
If desired, cover the surface of the plywood and all of the framing lumber pieces with clear coat. Allow to dry.
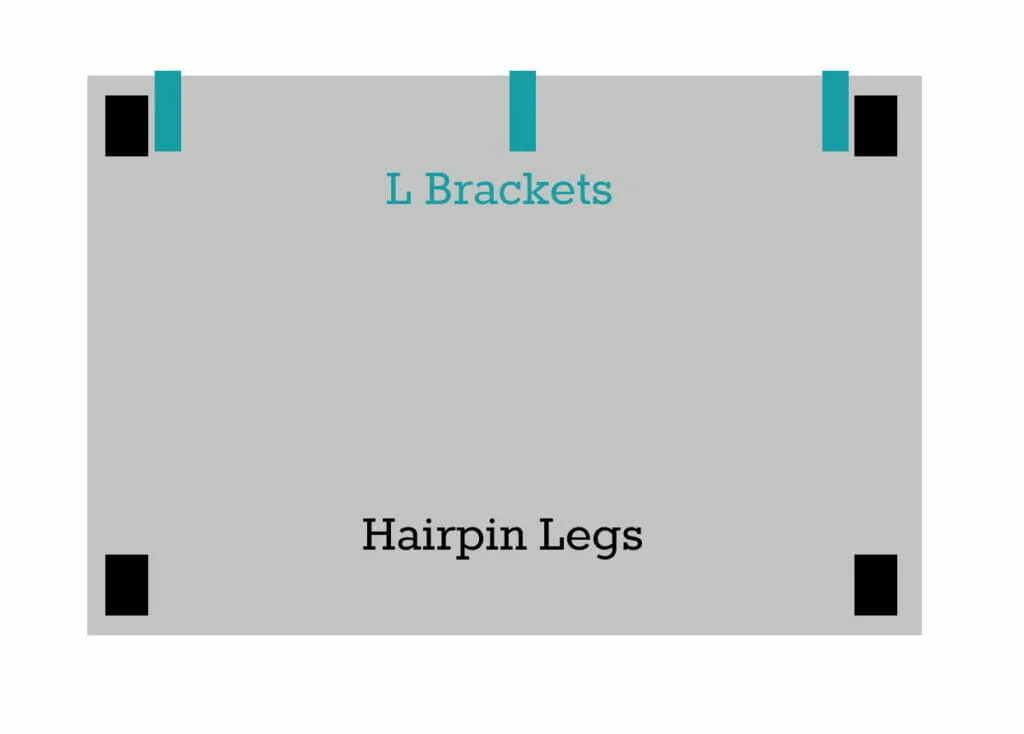
Step 6: Screw on the Legs and L Brackets
Measure 1/2″ away from the edge of each corner and screw on the hairpin legs. Pay careful attention to the placement. You want your legs slanted toward the outside of the bed with the long side of the leg plates running on the short sides of your plywood. Make sure you use a washer, so that the screw doesn’t poke out the other side of your plywood…like mine did on the first try. (Ugh.)
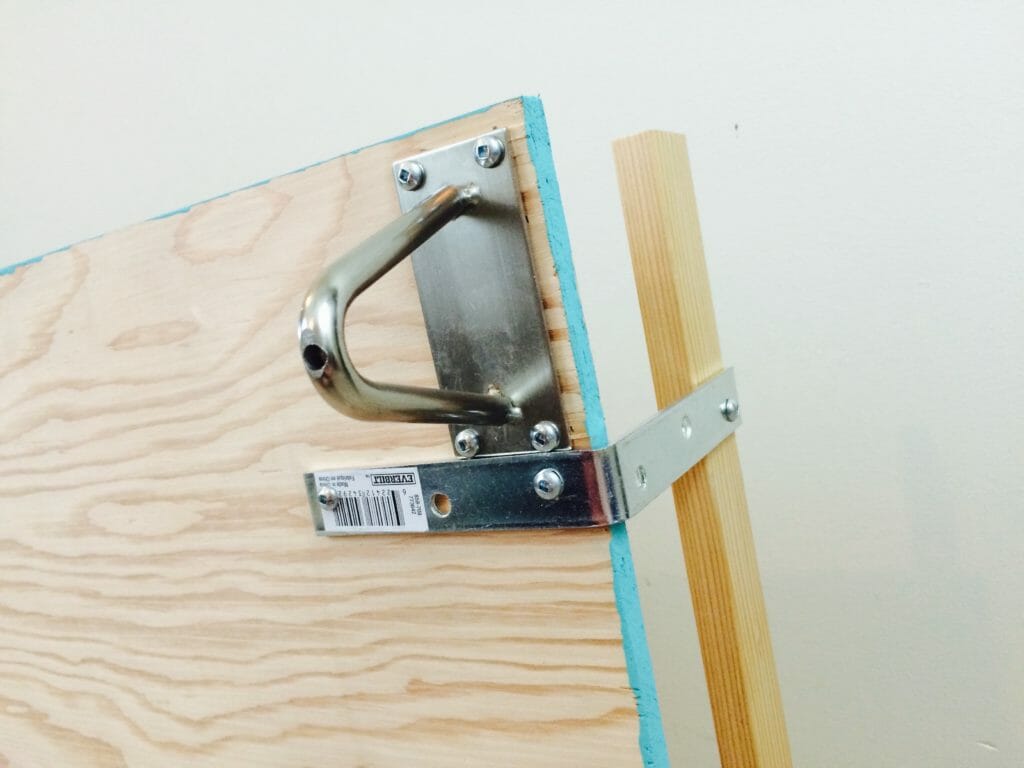
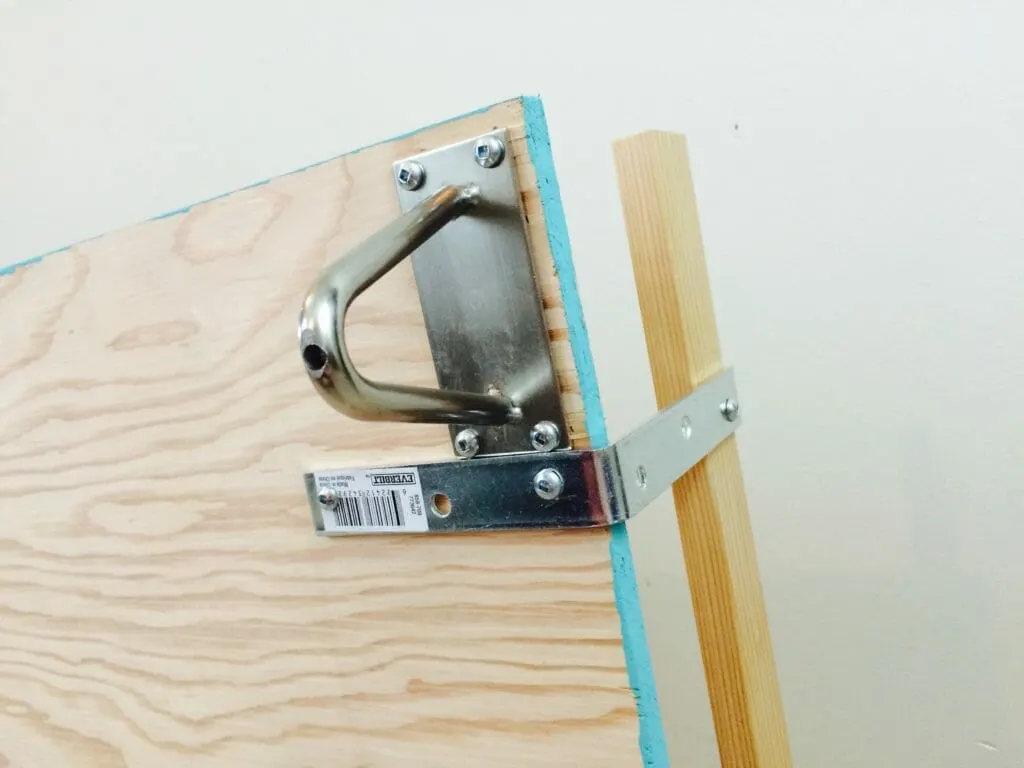
Place the L bracket against the feet on either end of the length and screw into place. (Again, use those washers folks.) Measure the center point of the length of your bed. Screw in the third L Bracket.

Step 7: Add the back bars
Line up the 1×2 with the long edge of your bed. Position the board so that the top of your L bracket is covering about an inch of the 1×2. (See the photo below for placement.) Screw in place. Repeat for all three L bracket
Set a mending plate on top of the L Bracket making sure it sits flush. Screw in place. Repeat for all three mending plates.
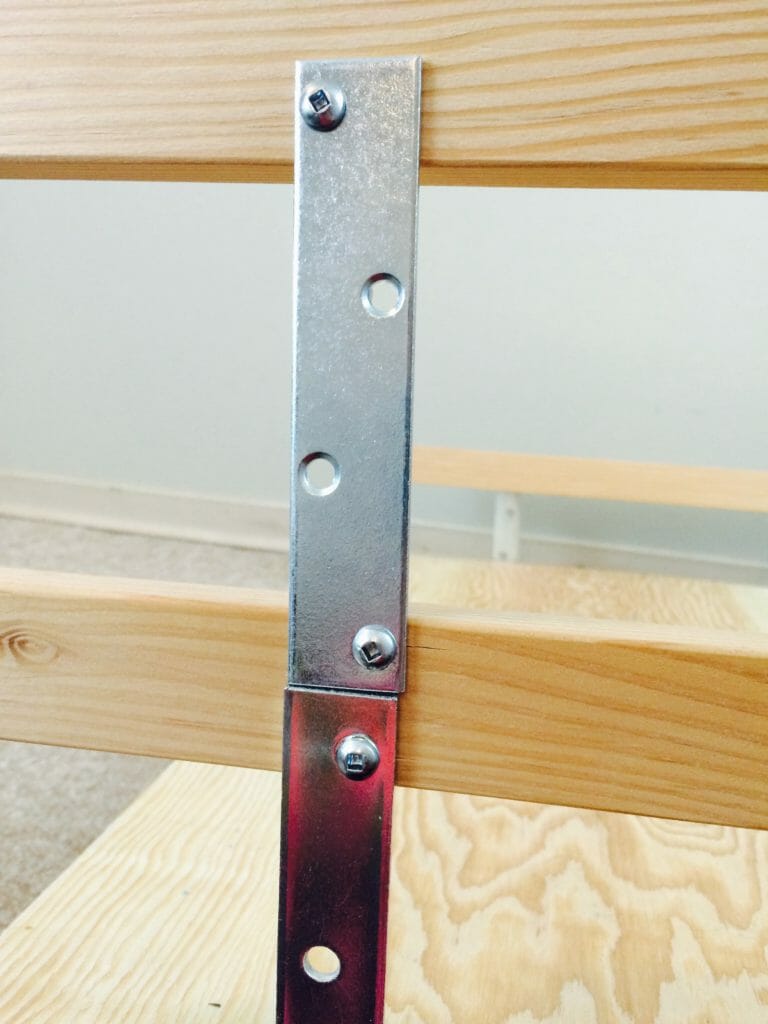

Line up the 2nd 1×2 with the edge of your bed. Position the board so that the top of your mending plate is covering about an inch of the 1×2.
Set a 2nd mending plate on top of the first mending plate making sure it sits flush. Screw in place.
Line up the 3rd 1×2 with the edge of your bed. Position the board so that the top of your mending plate is covering about an inch of the 1×2. Screw in place.
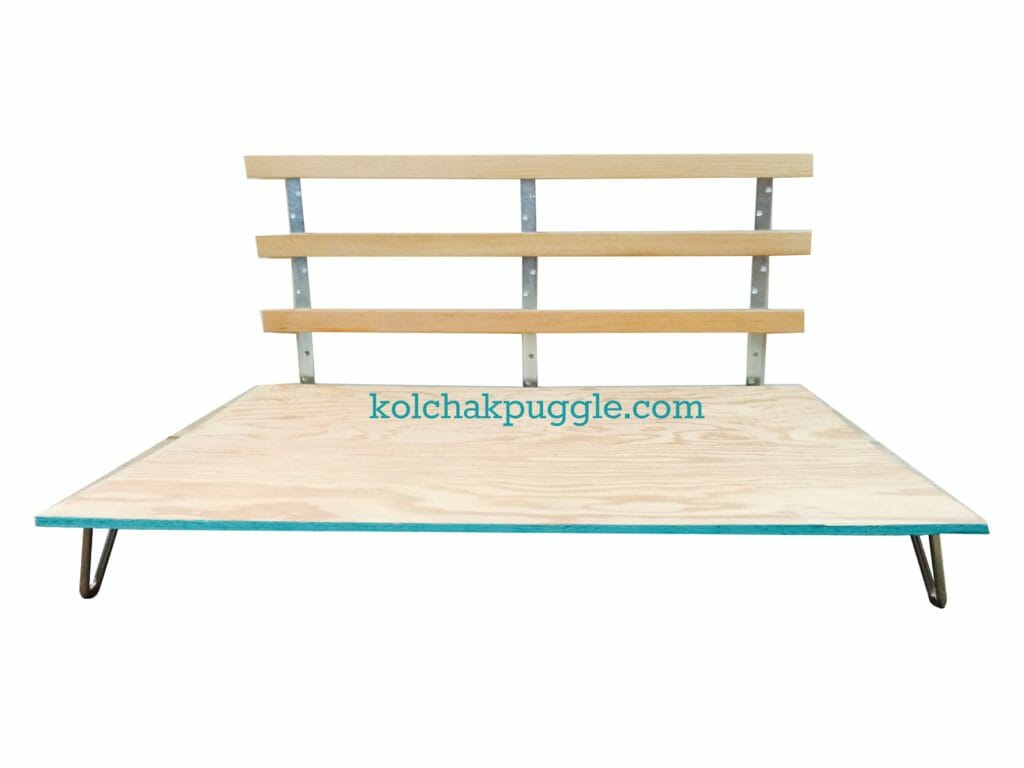
When you’re finished, it will look like this:
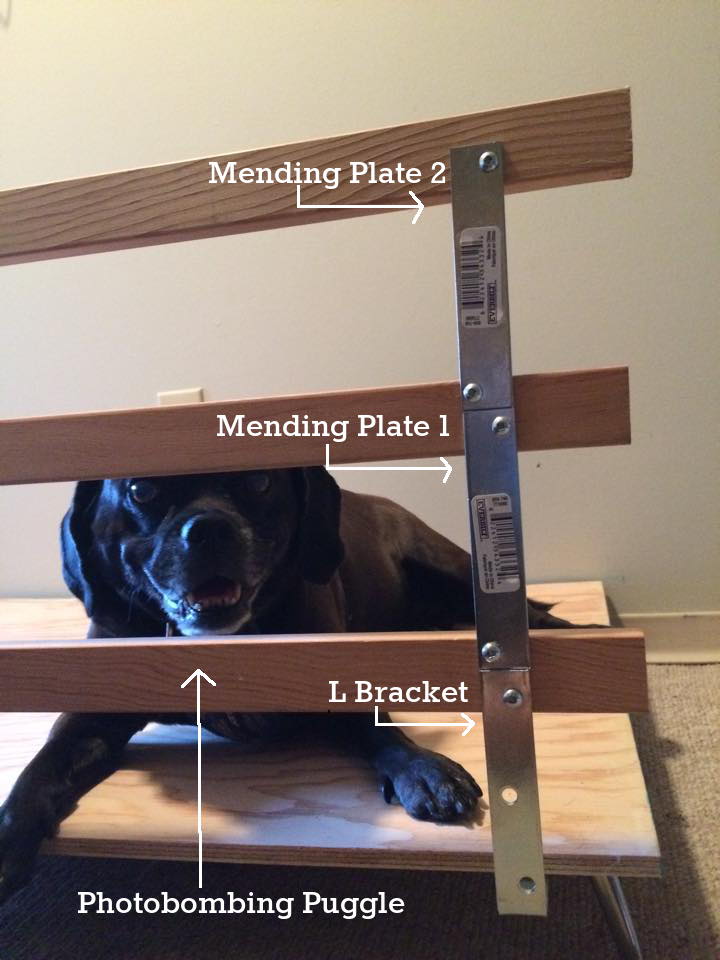

The photobombing puggle is optional… and kind of a pain.
Step Eight: Put your dog’s bed on the frame and add a couple cute accent pillows.

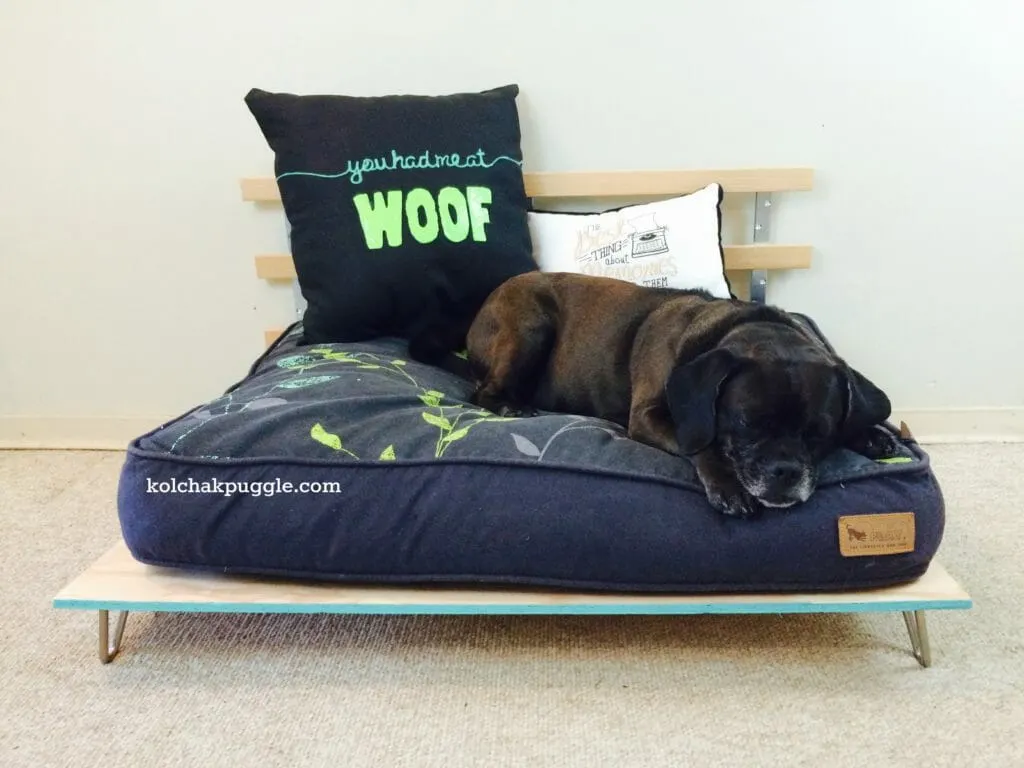
He loves it. He really loves it.
…and you’re done. I know. You thought there would be more steps, right?
I told you this was easy.
Do you prefer Felix’s super cute bed frame?
Jump to:
5 Fantastic DIY Dog Beds
Friday 16th of October 2015
[…] DIY Wooden Frame Dog Bed […]
homecinemaaddict.com
Thursday 10th of September 2015
Nice post. A few days ago bought a nest of tables for the lounge and am a bit dissatisfied, may need to do a little modification!
Talent Hounds
Friday 21st of August 2015
These look so cool. Kilo sleeps in luxury in his crate then likes to be on the couch or bed right next to me so he doesn't actually have a bed. I would have loved them for my lab. Have a great weekend.
Lauren Miller (ZoePhee)
Friday 21st of August 2015
That is so cool! I would love to make something like that for the girls!
Emma
Monday 17th of August 2015
So very cute! Don't really have a spot for these because of where our beds are and the style, but we love them!