
As a member of the Etsy affiliate program and an Amazon Associate, I earn from qualifying purchases.
Once upon a time, I had a clean home free of fur, muddy paw prints and not littered with the carcasses of destuffed toys.
My furniture had no fur. The place wasn’t constantly dishevelled and looking like someone had tossed the place and I had nice things. Things with no teeth marks, slobber spills or other earmarks of a dog homes.
Let’s face it: Dogs don’t really compliment the decor. Felix loves his giant BARNSLIG FLODHAST Ikea Hippopotamus, but that orange, red, polka dot freak of nature goes with nothing I own. It does not bring a sense of whimsy to the room – it just makes us look crazy. Ditto that for the Angry Birds scattered all over the place and it only takes one accidental kick of the Screaming Monkey to bring a dinner party to an awkward crashing halt.
 We have a toy basket, but um…it’s not working. We have too many toys and too little basket and besides that, it doesn’t fix the problem. Sure, it corrals the crazy all into one place, but it’s still there, right out in the open for everyone to see. I might as well wear a sign that says “Crazy Dog Lady”.
We needed a better solution for storing our embarrassing amount of dog toys.
I knew I wanted a toy box with a lid and I wanted it to look nice. No kitschy bone shaped dog toy boxes or brightly painted pieces that look like they’d be perfect in a nursery. I’m trying to class this place up just a bit. Just because your home is dog-friendly, doesn’t mean it can’t look good too.
The only problem was that all the toy chests I loved were worth about a bazillion kibbles. (No really, see here, here and here for the kind of things I liked. The cheapest was $425. For a toy box?!) I knew if I wanted something stylish AND affordable, I was going to have to do it myself. Good thing I LOVE a nice Doggystyle DIY project.
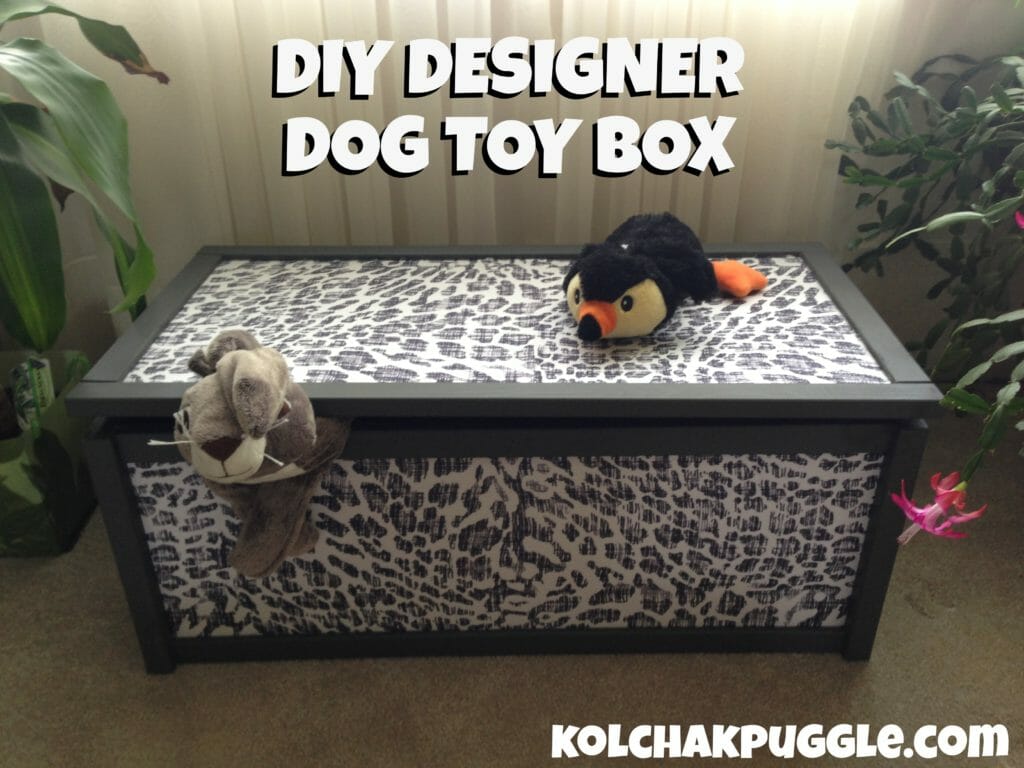
DIY Designer Dog Toy Box
I was surprised at how simply this project came together. It took me one afternoon of work, minimal DIY or crafting skills (ie. there’s no saws, drilling or hot glue involved) and I couldn’t be happier with the result. It goes perfectly with the grey colour scheme we’re building here at Casa de Kolchak, but it could be easily changed to fit any colour scheme you want. Here’s what you need:
- 1 APA Storage Box from Ikea ($14.99, if you can resist buying anything else while you’re there.)
- 1 small jar of paint ($4.98, we got the BEHR test jar with the paint & primer in one)
- 4′ or 5′ of 60″ wide fabric (I chose my material from the fabric store scrap bin and actually got 6.5′ for $5.00 – Always check the scrap bin! Even better, use easy peasy contact paper.)
- If you’re using fabric, a good quality clear crafters glue. ($3 – don’t use the school yard Elmers stuff)
- 1 piece of fine grit sand paper (I used a piece I stole from the Daddy’s work bench, but you should be able to pick up a piece for under a $5)
- Scissors ( You probably have these, right??)
- Small paint brush ($1 – I like the foam ones)
- two hinges ($2)
Total Project Cost: $36.00
Total Savings vs, my fav. online find? $389
Ok, let’s make a dog toy box.
- Open the IKEA boy and gasp in horror as you realize you’ve purchased the only IKEA item ever to come partially assembled. (What the woof, IKEA?! When I’m building my super complicated shelving system, you’re nowhere to be found, but when I’m slapping a few pieces together you jump in and help? NOT COOL.) Mope and eat cake while you reformulate a new plan. (You can totally skip this step. I’ve done all the heavy lifting here.)
- Lay out all the pieces on a flat surface (You should have two short sides and the lid pre-assembled, plus 4 side rails pieces, 2 side panels, a bottom and a handful of screws.) Sand the whole thing, even the white laminate parts. (It will help the glue stick later)


- Clean all the sanding dust up thoroughly.
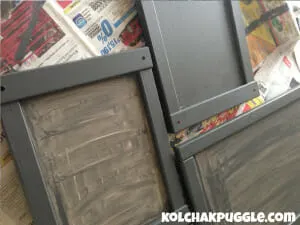
- Paint all of the wooden trim. You don’t even have to tape off the edges, since we’re going to cover the white face with fabric or contact paper. (The paint also peels off the laminate very easily. Jackpot.) Try to keep it tidy though, especially if you’re working with a lighter fabric.
- Allow paint to dry and then add a another coat. Repeat as needed to reach your desired colour. (Mine took two. Love that paint & primer.)
- While the paint is drying, take the two laminate side panels that are not already surrounded by wood. Trim fabric pieces that are slightly larger than the panels
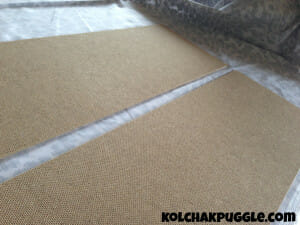

- If your fabric is wrinkly, iron it. Yeah, it’s a hassle, but the final result will look much nicer.
- Apply an even layer of glue to the white side of the panels. Cover the panel with fabric slowly and carefully, lifting the fabric and smoothing out wrinkles and air bubbles as needed. Set aside to dry. Once dry, trim off excess fabric. Use glue to set any loose threads or loose edges.
- If you work as slowly as I do, chances are your paint is dry by now. Jackpot, we can move on!

- Measure the size of the opening in your end panels. (I’d give you my measurements, but let’s get real, I’m pretty sure there are no two pieces of IKEA furniture exactly alike. Also, I forgot to write it down.)
- Cut two pieces of fabric slightly larger than your opening. Remember, measure 76 times, cut once. If you’re using contact paper, cut it just barely larger than your opening, like 1/16″ too big and apply to the surface. skip to step 15.
- Apply an even layer of glue to the laminate area of your end pieces only. Try to get the glue as close to the wood edges as possible without making a huge mess.
- Apply your fabric to the glued surface and allow to dry.
- Trim off excess fabric, leaving about 1/8″ extra around each edge. Cut carefully! If you trim off too much, you’ll be able to see the frayed fabric edge when you’re finished. (If you’re a perfectionist like me, that will mean pulling the fabric off, cutting a new piece and repeating this step again. You’ll be mad at yourself; I know I was.) If you don’t cut off enough it’s a real pain in the tail to complete the next step.

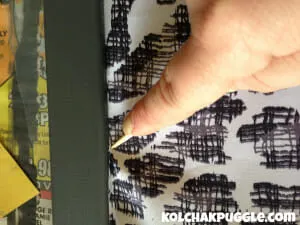
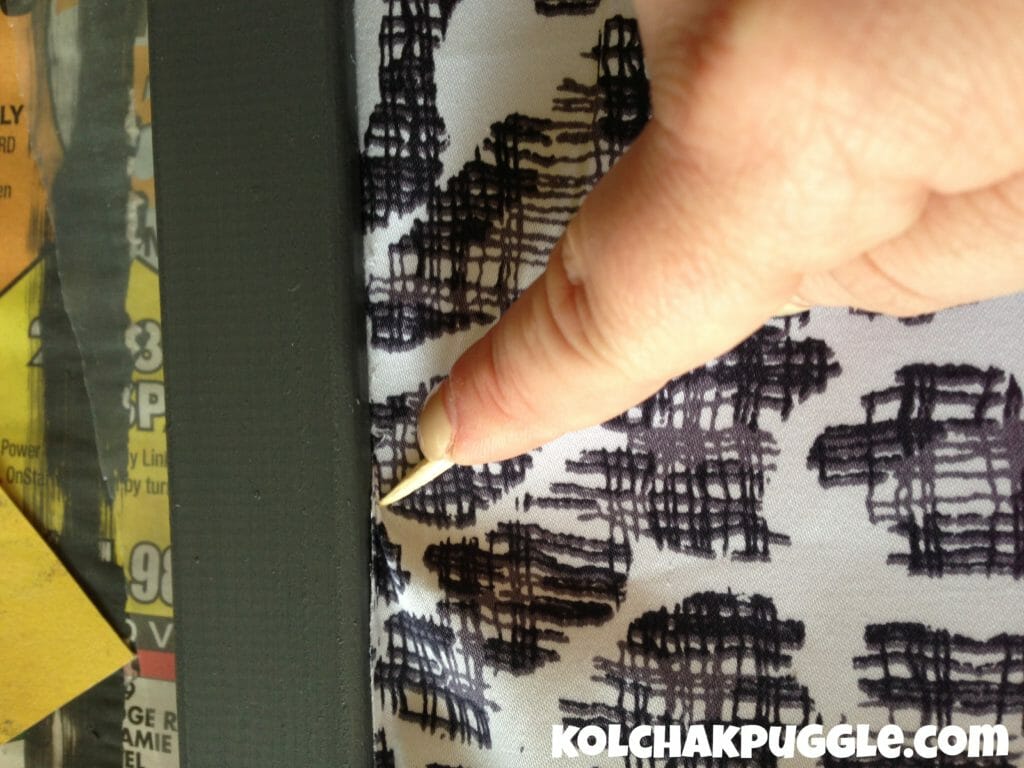
- Pipe a bead of glue right around the edge of the wood trim. Use a putty knife (or a butter knife, whatevs ya got) to force the edges of the fabric under the wood trim, so you can’t see any frayed edges. (This is seriously the hardest part. It takes a bit of elbow grease, but it can be done. I swear!)
- Repeat steps 10 – 15 for the lid.

- Use the super awesome wordless, stick figure directions and (duh) an allen key to assemble the toy box. (IKEA did Wordless Wednesday before it was cool, eh?)
- Expect some fabric/threads to come loose when you slide the side panels in. Use a bead of glue and the putty/butter knife to secure any loose fabric under the edge of the wooden trim.
- Position your hinges on the long edges and screw on, taking care not to splinter the wood.
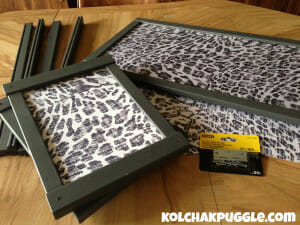
- Sit back and bask in the Doggystyle DIY Glory that is your new, totally stylish dog toy box.


Best 20 Diy Dog toy Box - Home, Family, Style and Art Ideas
Sunday 26th of January 2020
[…] Best DIY Dog Toy Box from DIY Designer Dog Toy Box Kol s Notes. Source Image: kolchakpuggle.com. Visit this site for details: kolchakpuggle.com […]
Craftfoxes » Featured Blogger: Jodi Chick
Monday 13th of November 2017
[…] projects you’ve ever made? I think my favorite project so far is, hands down, the DIY Designer Toybox (seen in the photo above). Kolchak and Felix have a TON of toys and they were slowly taking […]
20 DIY Projects for Dogs and Dog Lovers
Tuesday 5th of April 2016
[…] DIY Dog Toy Box by Kol’s Notes […]
Make Your Own Dog Toy Box | Bellisima Oldbuck
Wednesday 9th of September 2015
[…] DIY Designer Dog Toy Box – Kol's Notes. Jun 2, 2013 – DIY Designer Dog Toy Chest We have a toy basket, but um…it's not working. We have too many toys and too little basket and besides that, … […]
Lola The Pitty
Monday 10th of March 2014
This is a great idea! I bought this cute LITTLE basket from TJ Maxx for our dog toys and umm, yeah - we outgrew that about a day after I bought it.