

As a member of the Etsy affiliate program and an Amazon Associate, I earn from qualifying purchases.


This post also contains Amazon affiliate links. If you make a purchase, Kol’s Notes will receive a small commission.
OK, so let’s talk poop.
Is there anyone out there who likes being the dope with a bag of poop in their hand? I don’t. No one I know does. It’s gross… and a little weird. But, if you’re a responsible dog owner, picking up after your pet is just one of those things you have to do. No matter how icky it is.
Seriously though, how awkward is it, when you’re out on a walk and you run into people you know and you just have to stand thre, making polite conversation, like there isn’t a bag of crap in your hand? It’s not great and it’s even worse if the person you’re talking to isn’t dog people and you get that whole “Ew, I could never have a dog” remark.
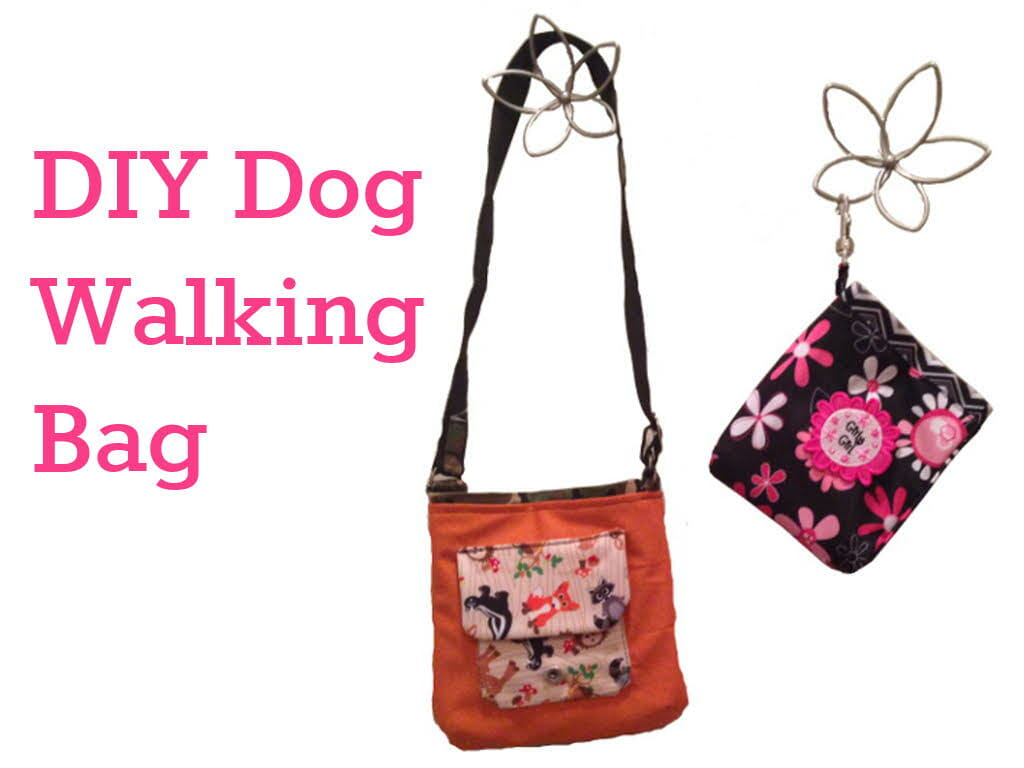
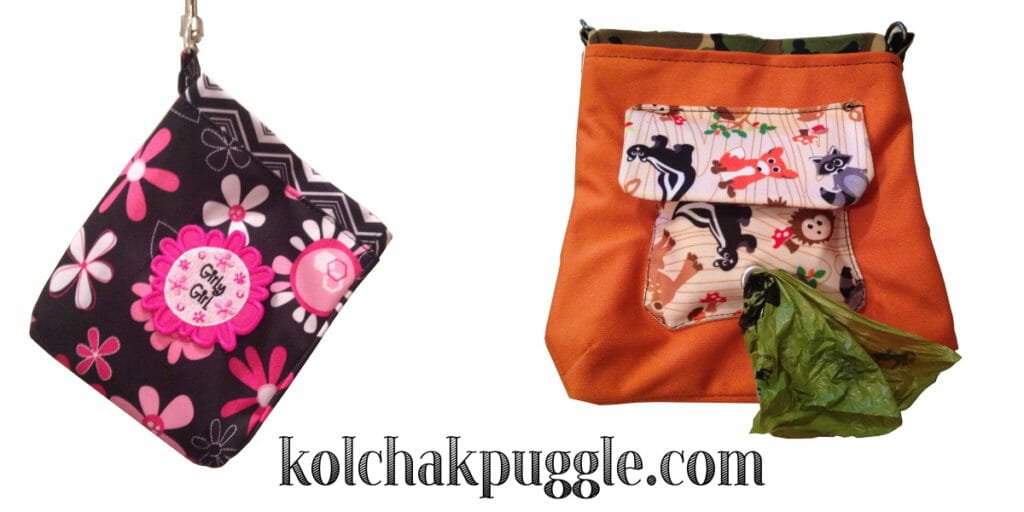
That’s why I am so in love with our new leash bags.
Check these out you guys!

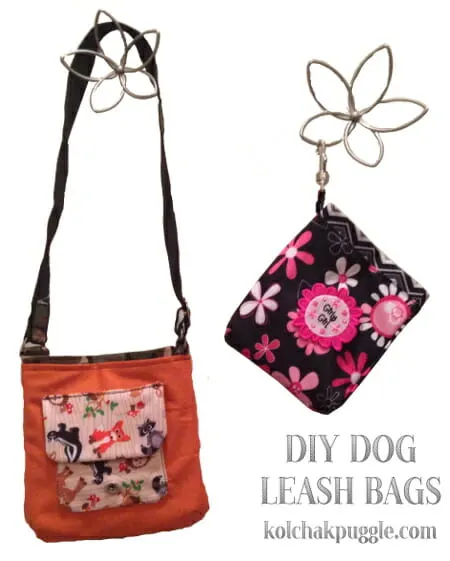
Unlike most leash bags, which are designed to hold your poop bags and keys and stuff, theses leash bags are designed to hold your dog’s poop, quietly hidden away, until you find a trash can or, if you’re like Pamela at Something Wagging, get home to flush it.
I knew right away exactly what type of fabric I wanted to make these out of. Back in the summer, we share a DIY Drying Mat and a DIY Outdoor Pillow using the Babyville Boutique Waterproof PUL. The Babyville Boutique PUL is a laminated material that is pretty patterns on one side and plastic on the other. It’s designed for baby diapers, so it clearly knows how to stand up to poop. Babyville was kind enough to send me two packages of their newest PUL Pattern collections to play with: Forest Friends, a collection of orange, camo and the most adorable woodland creatures and Pink Floral, a sassy mix of 70s style flowers, a modern white grey & black chevron and a plain white.
Here’s what you need to make a Babyville Leash Bag of your own:
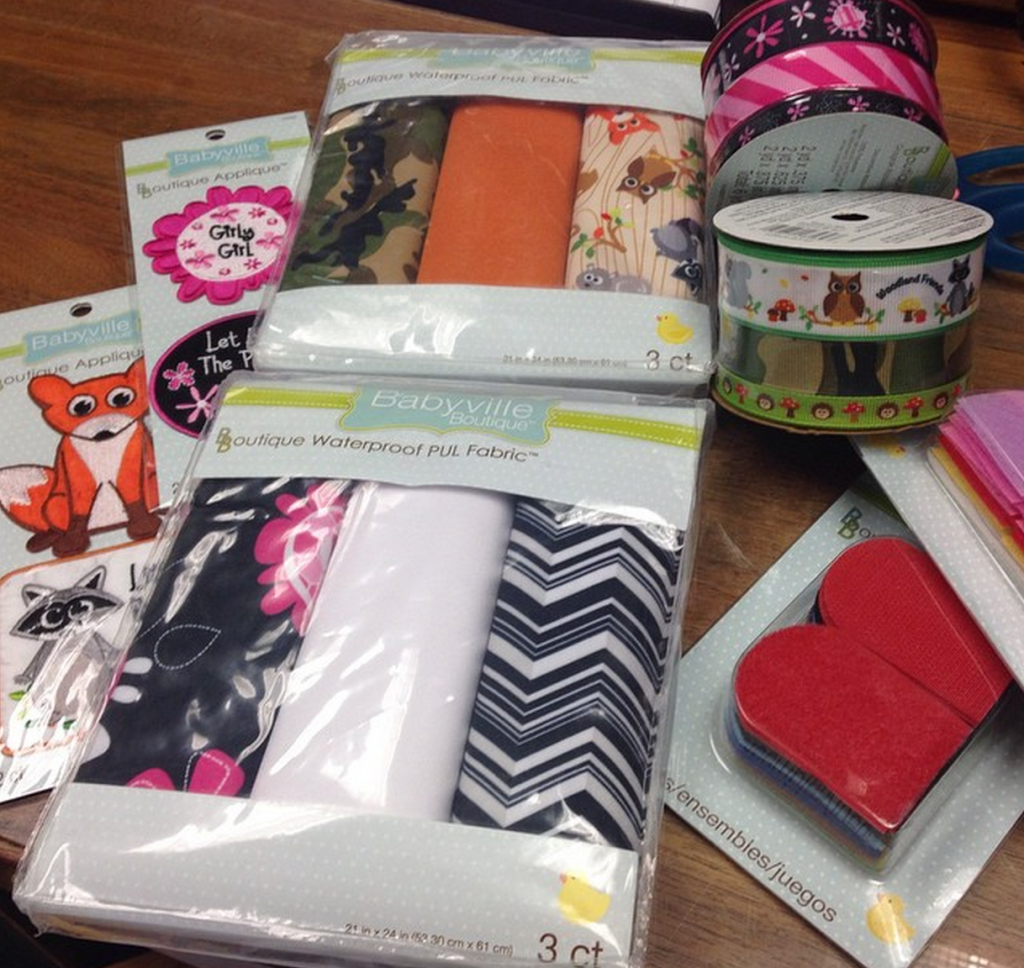

Everything I could want or need to make a leash bag, courtesy of Babyville Boutique.
1 package Babyville Boutique Waterproof PUL Patterns
- 1 package EZ Tab Velcro (If you forget to sew the velcro on, the Babyville snaps work GREAT, as well)
- Good quality, polyester thread in a co-ordinating colour
- Optional: Co-ordinating ribbon for the strap
- Optional: Decorative Iron On
Cross Body Leash Bag – Click here to download the templates
You’ll also need:
(I’ve linked to the hardware on Amazon, but honestly, check out your local sewing shop. Many carry these items loose for a much better price.)
- 2 x 1″ D rings
- 1 x 1″ slide buckle
- 1 x 1″ grommet
- 48″ x 1″ nylon strapping
Hanging Leash Bag – Click here to get the templates
You’ll also need:
- 1 x 1″ Bolt Snap
Equipment:
Sewing Machine with a size 11 Ballpoint or size 10/12 Universal needle
Iron (Use the cotton setting/no steam)
Pressing Cloth (PUL is prone to scorching if you apply direct heat. I may have melted a piece…or two)
Grommet setting tool & hammer
Alright, let’s get down to business.
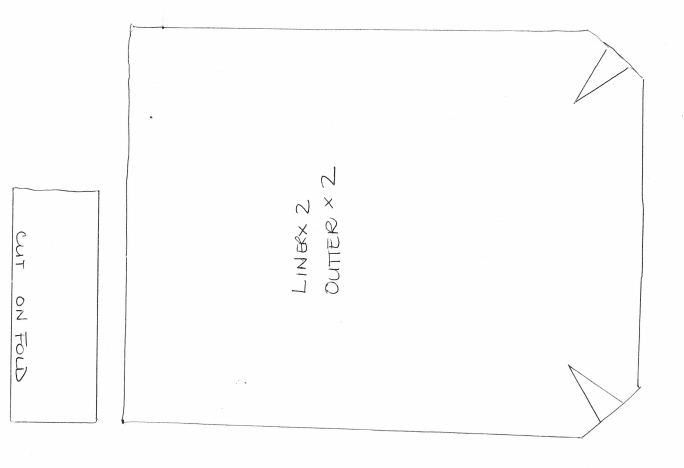
1. Print the template for the bag you wish to make. (I call it a template because I’m not a seamstress and this isn’t some fancy pants pattern. It is just a rough outline for the size & shape of each fabric piece you will need.)

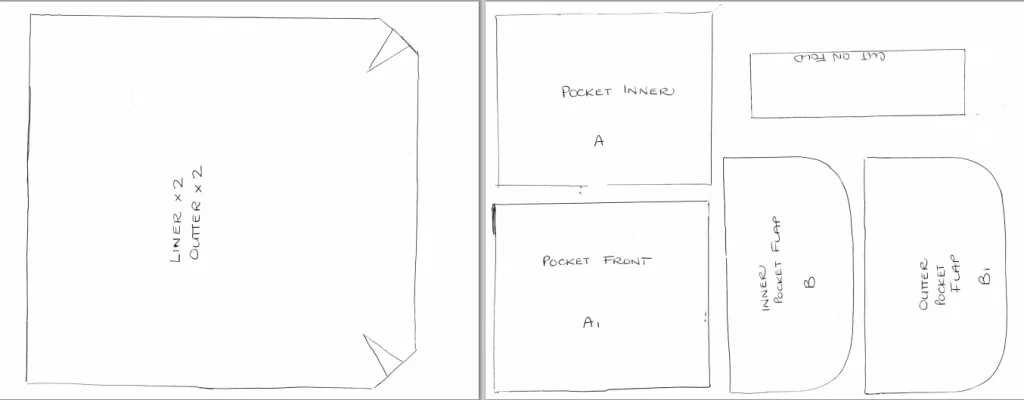
We’re going to call that thin rectangular piece at the top left “C” and you’re going to need 2 of them.
2. Select your fabric patterns. Anytime the template says to cut two, I recommend cutting them out of the same patterns fabric, unless you want a really eclectic bag.

***Kol’s Note*** If you are making the Hanging Leash Bag, skip to step 7***
3. Sew the EZ Tab Velcro onto the fabric side of Pocket Front (A1) and onto the inner pocket flap (B)
4. Sew together the pocket inner (A) and pocket front (A1), Fabric side in. (One piece will be slightly taller than the other.) Turn the pocket right side out, fold over the top of the pocket and tuck it into the top. Place the pressing cloth over the PUL and iron the pocket flat, melting the PUL together. Stitch across the top to hold the top of the pocket in place.
5. Sew together the inner (B) and outer (B1) pocket flaps. (One piece will be slightly taller than the other.) Turn the flap right side out, fold over the top, tucking it into the flap. Place the pressing cloth over the PUL and iron the flap, melting the PUL together. (Do not stitch the top. You will sew this flat when you attach it to the bag front.)
6. Cut a small hole in the pocket. Place a grommet in the hole, cover with a cap on the front side (opposite of the side with the fold over) and setting in place with the grommet tool and a hammer.
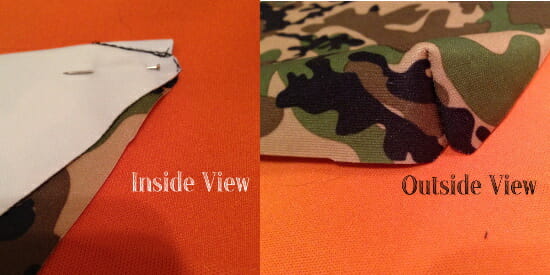
7. Fold over the bottom corners of each bag inner and outer piece. Sew along the lines to create a slight “tent” effect.

*** Kol’s Note: If you are making the Hanging Leash Bag, skip to step 9 ***
8. Place the pocket and the pocket flap on the fabric side of one of the bag outer pieces and pin in place.

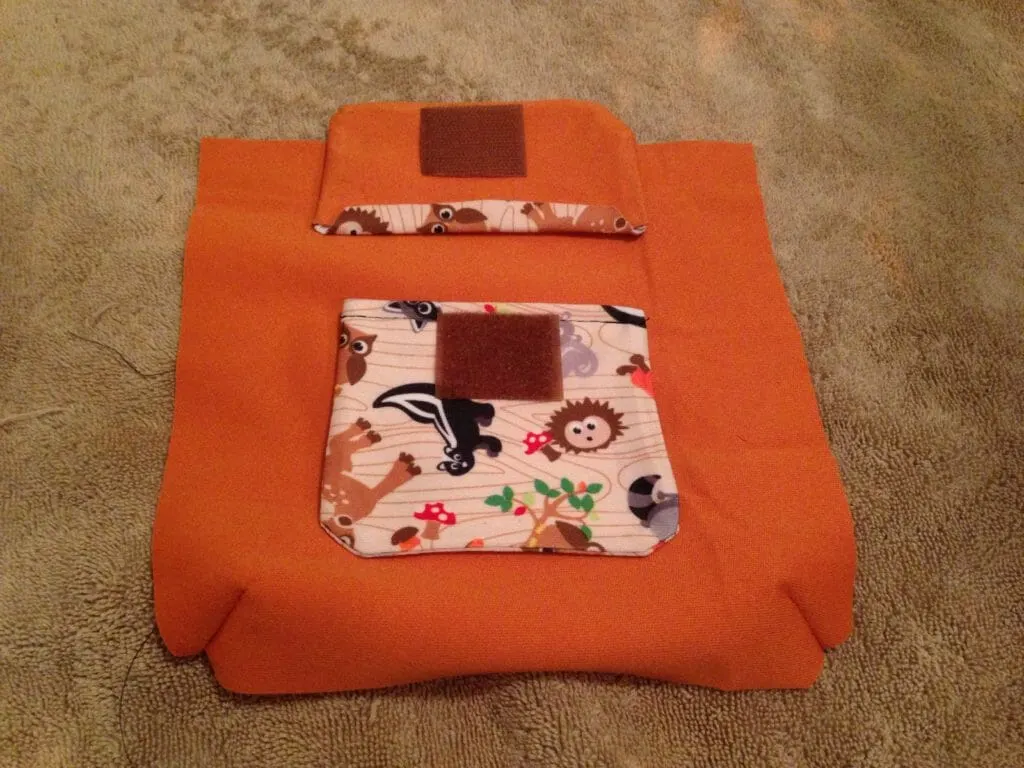
The flap is place a little high in this picture. You want the two pieces of velcro to line up.
9. Pin the two bag outer pieces together, fabric side in. Stitch along the edges & bottom, then turn the bag right side out.
10. Pin the two bag inner pieces together, fabric side in. Stitch along the edges & bottom. Fold over the top by 1″ and hem in place.
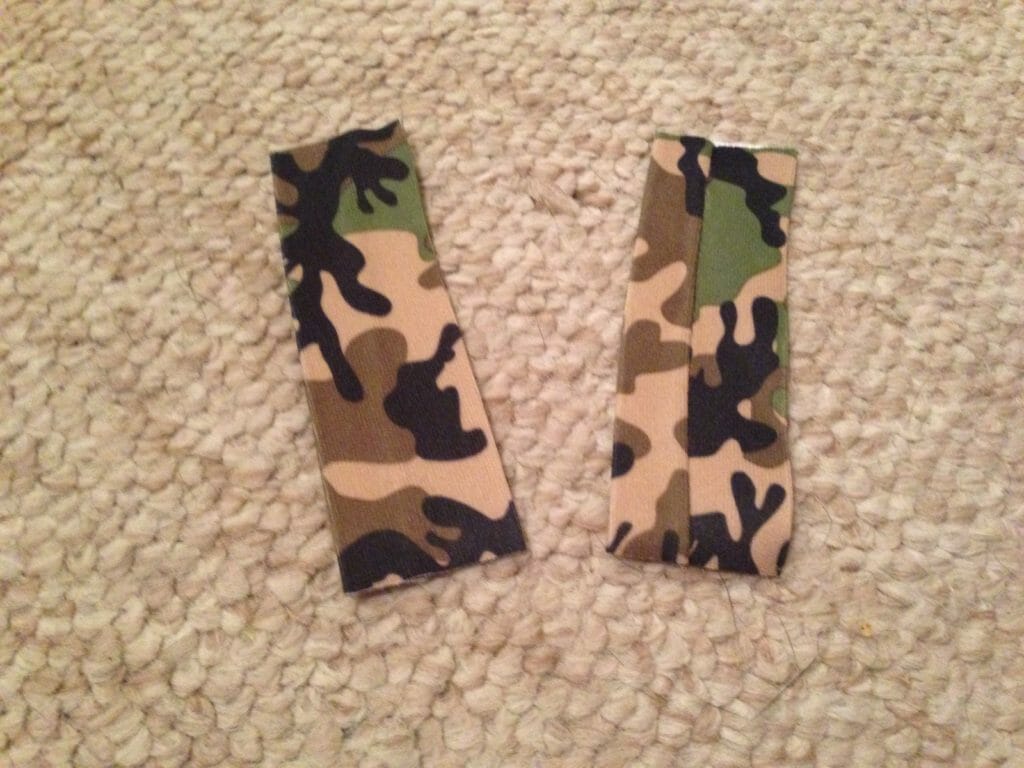
11. If you didn’t see the note above, cut another piece C (The small rectangle, cut on the fold.) You will need 2 of these for the cross body bag or one for the hanging bag. Fold the peice in half, lengthwise and sew the long edge. Turn the fabric right side out, cover the piece with the pressing cloth and iron flat with the seam on the bottom, in the centre.

13. Place a D ring on one of the tabs, fold the tab in half and pin to the bag, covering one of the side seams. Stitch in place with a 1″ x 1″ box shaped seam, then sew an “X” across the box. (Trim off any excess fabric on the tab. I made the pattern a bit longer than I needed to make it easier to sew. Repeat on the other side of the bag.
**Kol’s Note: If you are making the hanging bag, replace the D ring with the bolt snap and only complete this step on one side.
13. Turn the bag inner right side out. Place a piece of EZ Tab velcro on each fabric side. (Directly across from one another, below the hem line.) Stitch in place. Turn the bag inner inside out again.
14. Place the bag inner inside the bag outer, ensuring it is place all the way down and the corners are lined up.
15. Fold over the top hem of the bag outer and pin in place. A small bit of the inner hem should show at the top.
16. Cover the bag with the pressing cloth and iron the bag to melt the PUL together. Stitch around the top hem of the outter.
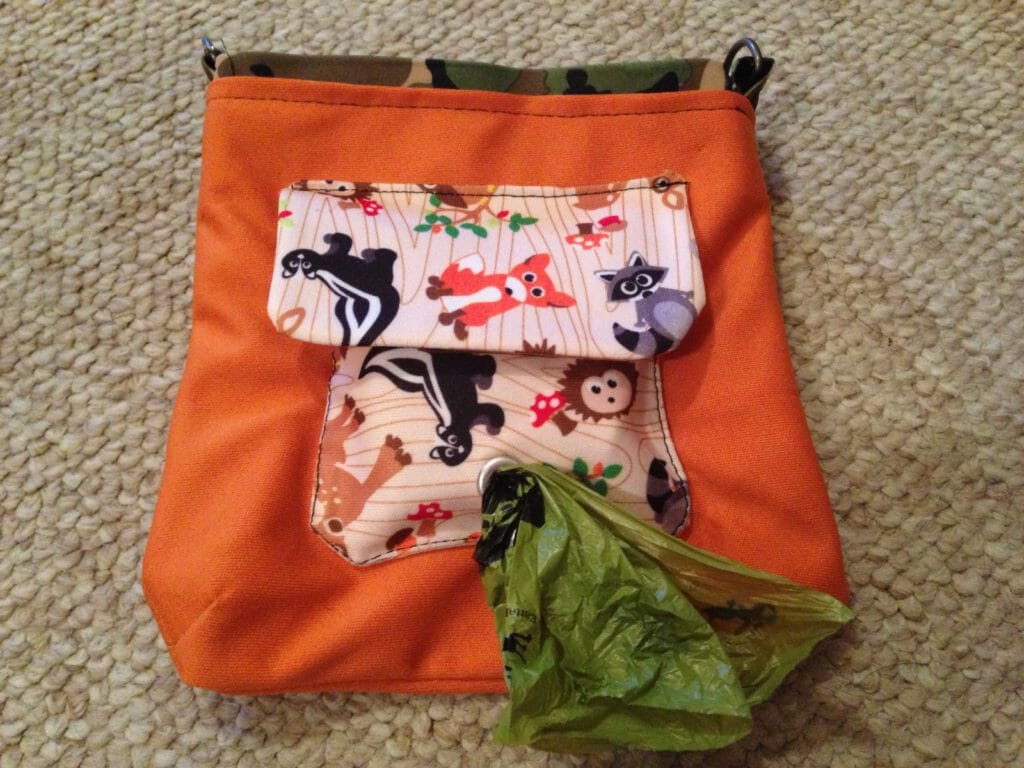
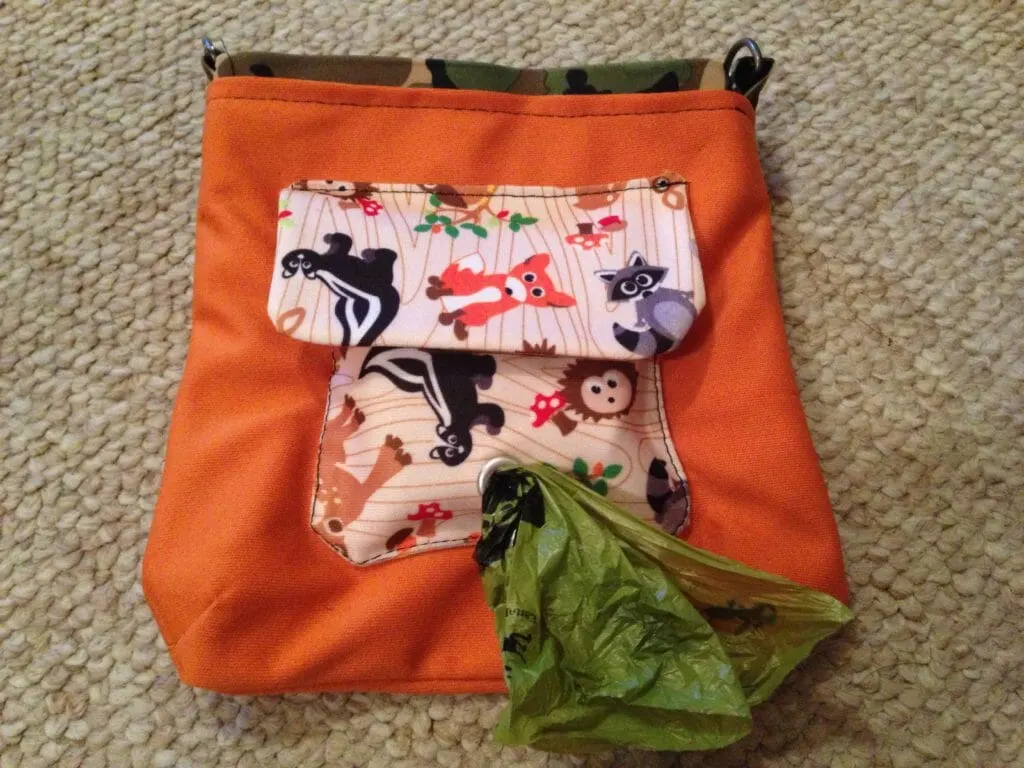
Bag, with a roll of pick up bags in the pocket, pulled through the grommet.
17. If desired, add an iron on patch to the face of the bag and stitch or iron on. (I’m 99.9% certain a Forest Friends bag wouldn’t be complete without ironing this little guy onto the back side. LOOK AT HIM.) Turn off the iron, you’re done with it.

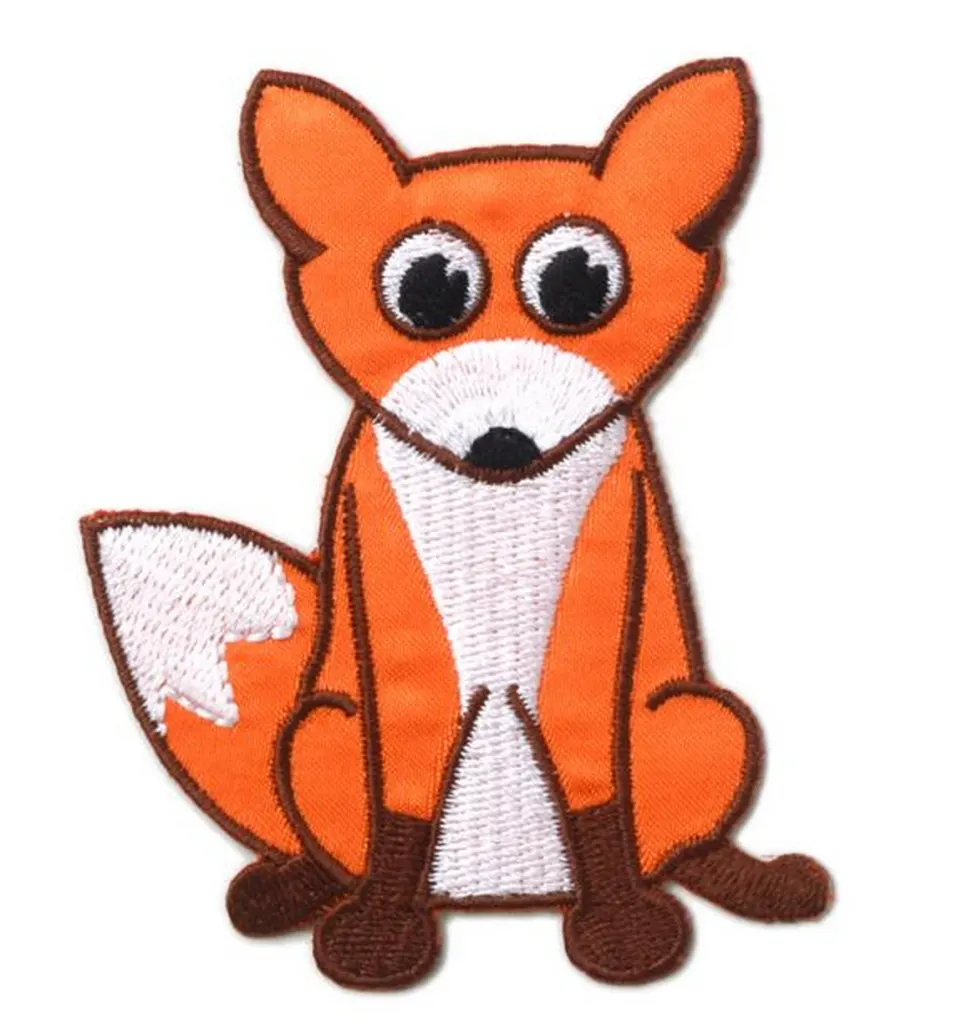
Get him at Babyville Boutique
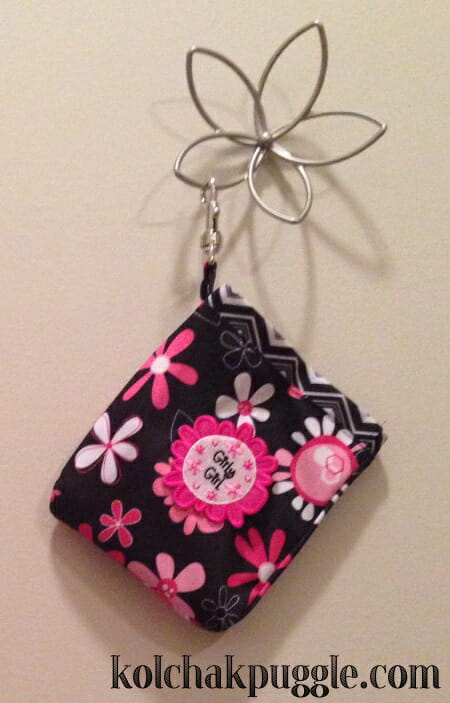
Congratulations! If you’re making the hanging leash bag, you’re done and it should look a little somethin’ somethin’ like this:

If you’re making the cross body bag, there’s just a couple steps left!
18. If desired, trim your strap with ribbon. Babyville Boutique makes some super cute co-ordinating ribbon patterns to match their fabric sets. For my bag, I was torn between these two:
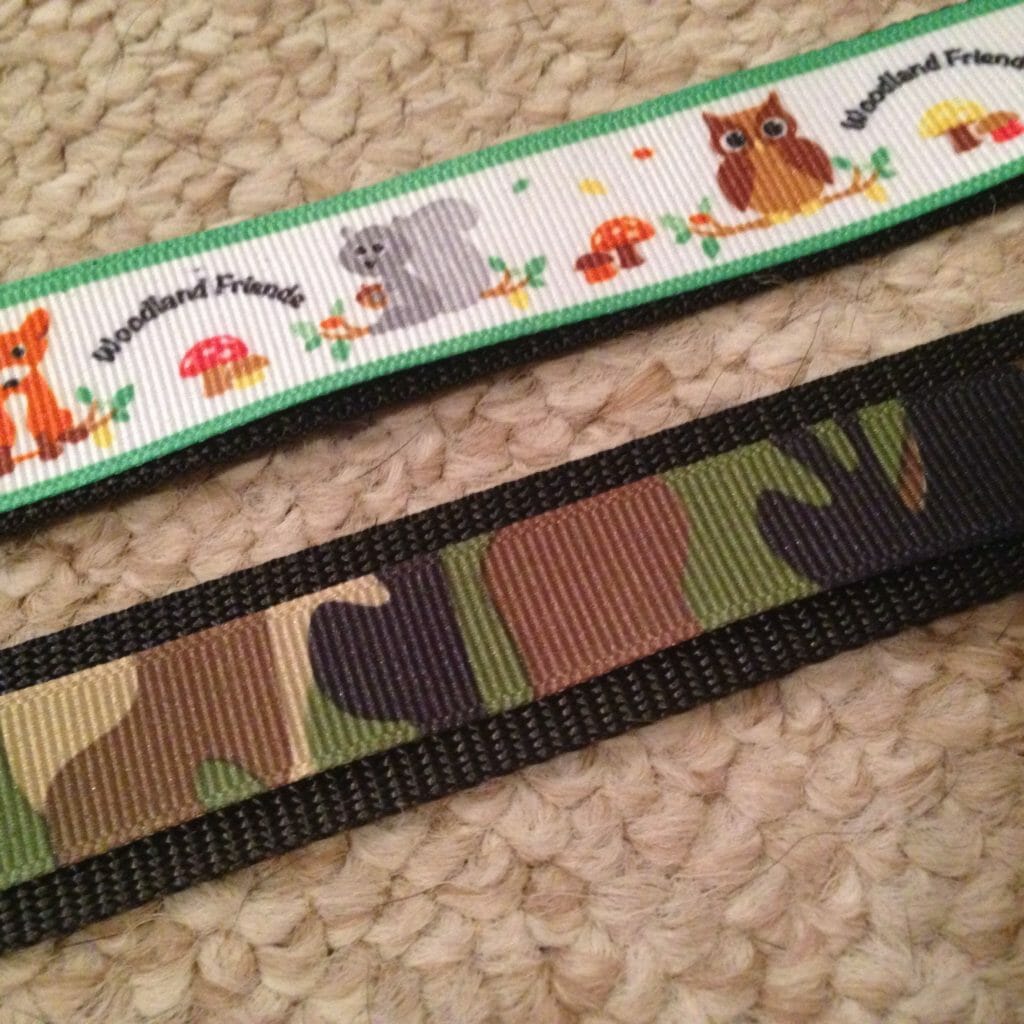

How cute is the ribbon with the animals??
In the end, I chose the camo because I am a hot mess and I was pretty sure I would get grubby finger prints on that white ribbon PDQ. Pin the ribbon onto your strap and sew down either edge to secure it in place.
19. Carefully, use a lighter to melt the ends of the nylon strapping to keep it from unravelling. (For the love of woof be careful though! I don’t want anyone setting fire to themselves.)
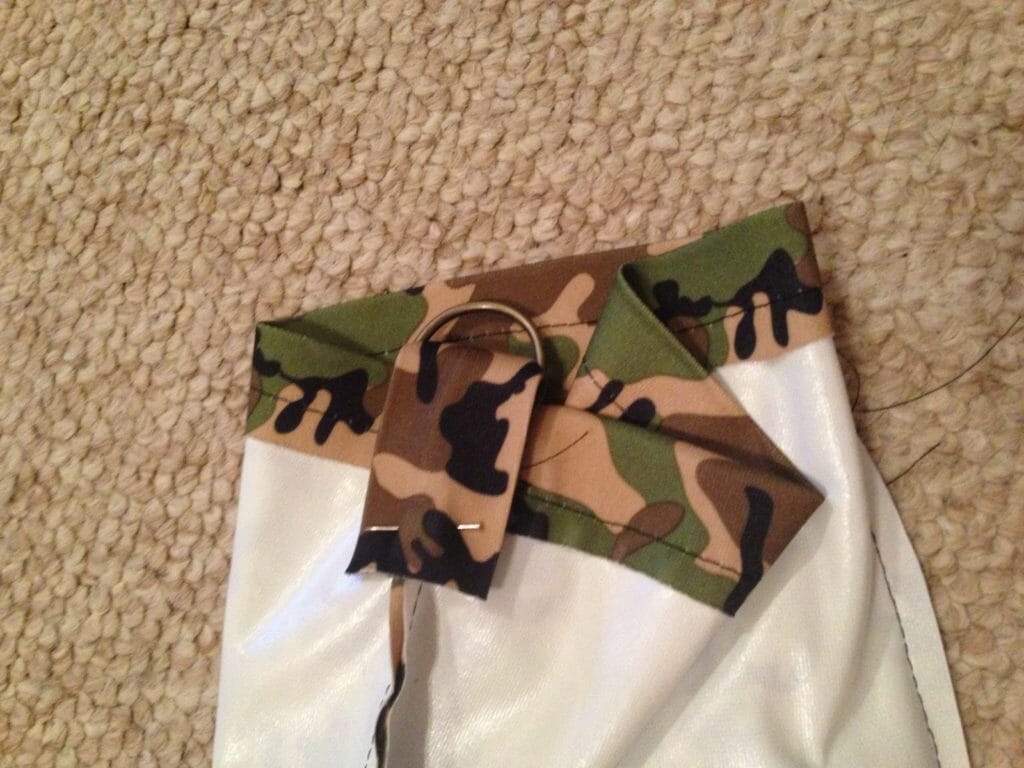
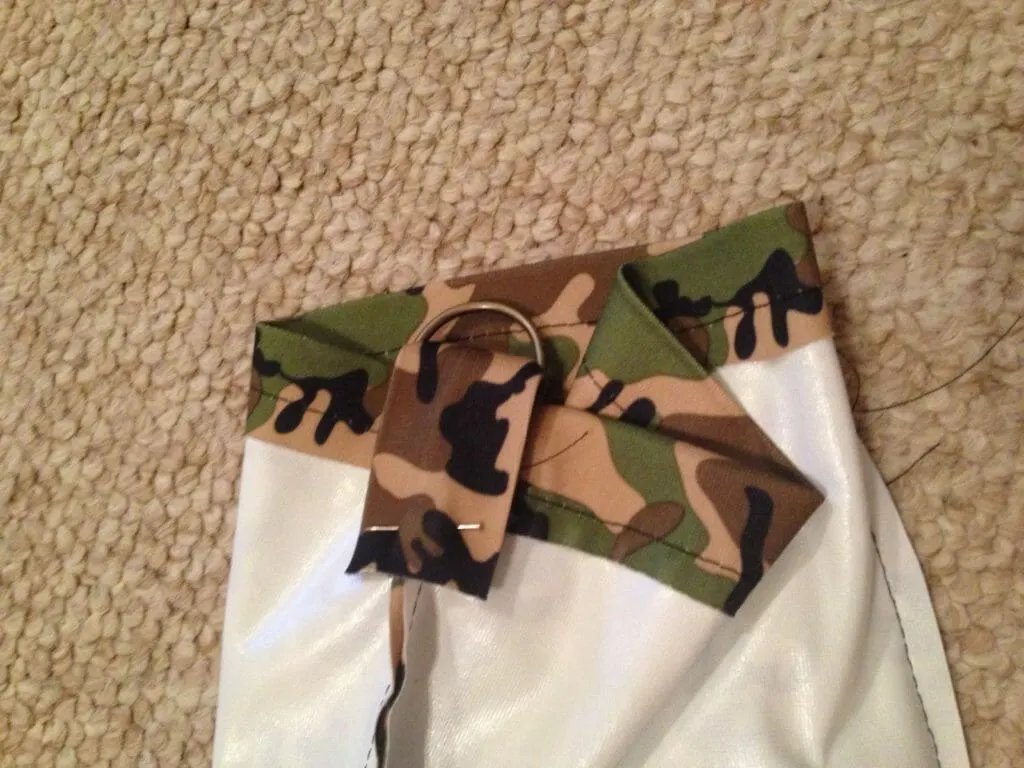
20. Thread the strap through one of the D rings, taking care to ensure the ribbon is facing out. Stitch the strap in place by sewing a box, then sewing an “X” in the box.
21. Thread the strap through the slide buckle, like so, taking care that the ribbon is to the exterior.

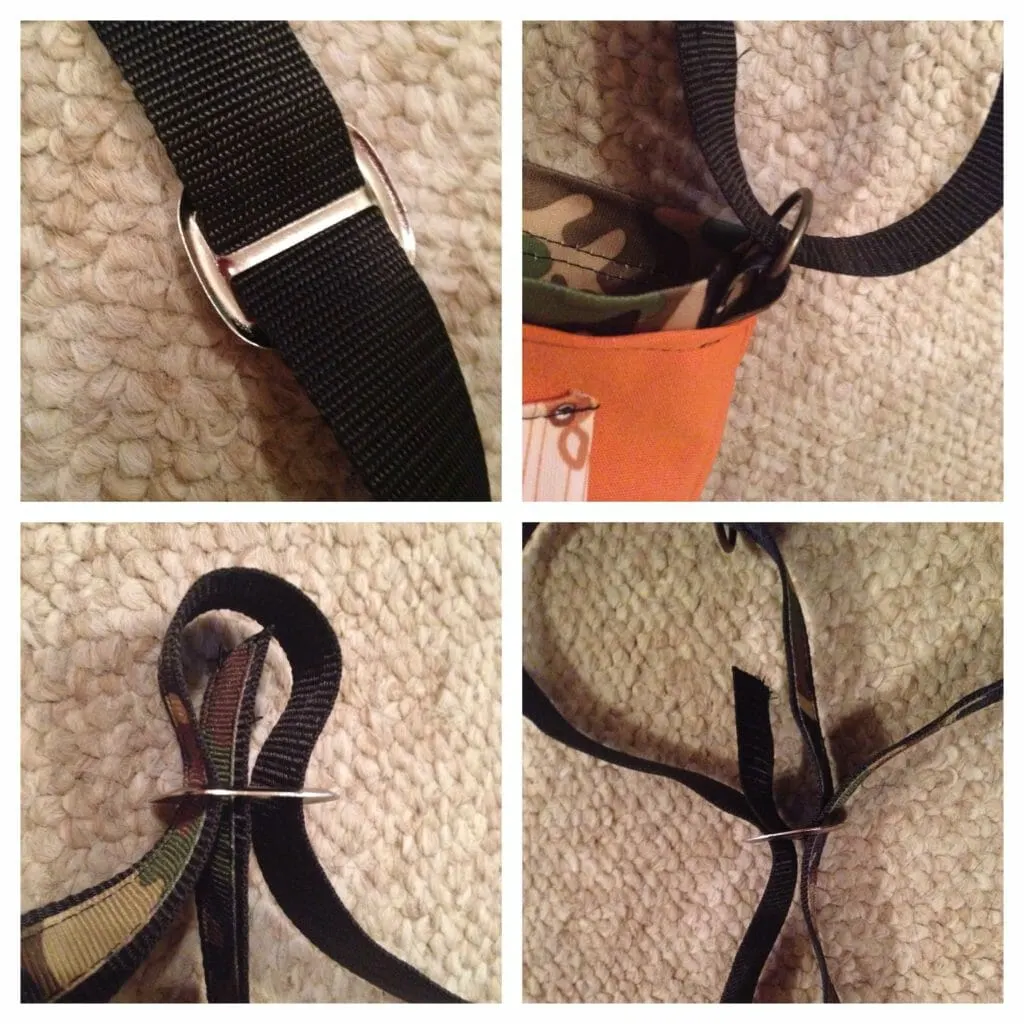
22. Stitch the strap in place by sewing a box, then sewing an “X” in the box.
23. Adjust the strap to fit you comfortable.
You’ve done it! Your DIY Leash Bag is complete (and let’s face it, woofing adorable.)

So. Darn. Cute.
Now when you’re out on walks, you can pick up your poop using a plastic bag (We love the ones from Earth Rated), hide it away inside your leash bag and then toss it at your earliest convenience. No more awkwardly walking around displaying your dog’s crap for everyone to see (yuck).
Occasionally, I spritz the inside of the bag with essential oil based room spray and, when needed, the whole thing gets tossed in the wash. Since you’re using plastic bags for pick up and just hiding those in your leash bag, it doesn’t actually get gross or dirty, but on those rare occasions when a bag splits or gets…messy (ew ew ew), it’s great to know that this fabric is designed to handle it.
Let’s talk poop. How do YOU feel about carrying that icky bag around?